Cast-In vs Post-Installed Anchors: Methods and When to Use
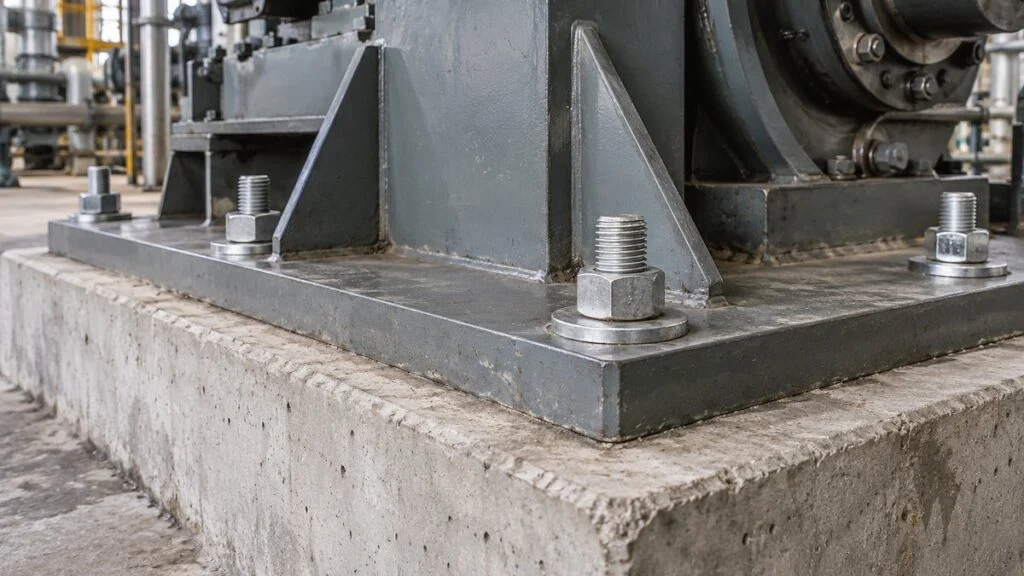
A Japanese supplier sends an installation drawing for a pump skid. Next to the anchor bolts it says 先埋め (sakiume) on one sheet and 後打ち (atouchi) or あと施工 (ato-sekou) on another. Your civil team needs to know which bolts go into the formwork before the pour and which will be drilled in later.
The short answer: sakiume means cast-in anchors, set before the concrete is placed. Atouchi and ato-sekou mean post-installed anchors, fixed into concrete that has already hardened. The difference is when the anchor goes in and how it is held in the concrete. The name alone does not tell you which one is stronger or how heavy a machine it can hold.
This guide explains both methods, what each one needs checked on the drawings and on site, how the Japanese terms line up with ACI 318 Chapter 17 and EN 1992-4, and ends with a checklist, supplier questions, and a sample email. It does not give installation procedures: anchor design and installation follow the project's designer and the anchor manufacturer's instructions.
Contents
- Japanese Anchor Terms You Will See on Drawings
- Cast-In Anchors (Sakiume): Set Before the Pour
- Post-Installed Anchors (Atouchi / Ato-Sekou): Fixed Into Cured Concrete
- How Japanese Practice Compares with ACI 318 and EN 1992-4
- Installation Quality: What to Confirm, Not How to Do It
- Cast-In vs. Post-Installed: Side-by-Side Comparison
- Anchor Review Checklist
- Questions to Ask the Japanese Supplier
- Limits of This Guide
- FAQ
- Sources
Japanese Anchor Terms You Will See on Drawings
Japanese installation drawings (suetsuke-zu) and foundation drawings (kiso-zu) often mark anchors with short labels like these. The table lists the ones covered in this article. Drafting habits vary by company, so if a label is unclear, ask the supplier what it means on their drawing.
| Japanese | Romaji | Meaning in English |
|---|---|---|
| 先埋め / 先付け | sakiume / sakizuke | Cast-in anchor (set before the concrete is placed) |
| 後打ち / あと施工 / 後付け | atouchi / ato-sekou / atozuke | Post-installed anchor (installed in hardened concrete) |
| 金属系アンカー | kinzoku-kei | Mechanical (metal) anchors, including expansion anchors |
| 接着系アンカー | setchaku-kei | Bonded (adhesive) anchors |
| ケミカルアンカー / 樹脂アンカー | kemikaru / jushi anchor | "Chemical" or resin anchor, a common name for adhesive anchor products |
| 母材 | bozai | Base material (the concrete the anchor is fixed into) |
| 埋込み | umekomi | Embedment |
| へりあき | heriaki | Edge distance |
| 突出し | tsukidashi | Projection (how far the bolt sticks out of the concrete) |
JCAA (日本建設あと施工アンカー協会), the Japanese industry association for post-installed anchors in construction, uses the same split. It defines cast-in anchors (sakizuke) as anchors set in position before the concrete is placed, and post-installed anchors as anchors fixed in holes drilled into hardened concrete. It then divides post-installed anchors into mechanical, bonded, and other types.
Cast-In Anchors (Sakiume): Set Before the Pour
A cast-in anchor is placed in its planned position inside the formwork, held at the right location and height while the concrete is placed around it, and used to fix the equipment once the concrete has cured.
With a cast-in anchor, the embedded end becomes part of the foundation before the concrete hardens.
A conceptual example with a hooked anchor; headed and other shapes are also used. Reinforcement, dimensions, and tightening conditions are not shown. On small screens, scroll the figure sideways.
Cast-in anchors come in headed, hooked, and other shapes. They do not hold only by the bond between steel and concrete: the head or the bent end also bears against the concrete. That is why the anchor shape and the anchorage design are checked together.
The main advantage is planning. When a new foundation is designed, the anchor layout and the embedded part can be designed with it, and no one has to drill hardened concrete later. If the equipment location and foundation shape are fixed at the design stage, the civil and structural designers can coordinate their requirements with the equipment team early.
- Location and anchorage shape are planned together with the new foundation
- No drilling into cured concrete
- The designed layout is held during the pour, and checks are easy to record
Cast-in anchors are an option for large equipment, but "cast-in for heavy loads, post-installed for light loads" is not a safe selection rule on its own. Both methods need the same design checks, covered below.
Matching Anchor Locations to the Equipment Baseplate
Once the concrete has cured, a cast-in anchor cannot easily be moved. The anchor locations must match the holes in the equipment baseplate, and the projection and equipment mounting height must be checked too, so that nothing clashes with the equipment when it arrives.
Even with the same number of bolts, a different spacing, orientation, or reference centerline means the holes will not line up.
An example of layout and holding only. Not a drawing of bolt count, dimensions, or formwork. On small screens, scroll the figure sideways.
A template that holds the bolts during the pour does not remove errors if the reference centerline or the bolt orientation is wrong. Rather than checking the equipment drawing and the foundation drawing separately, compare hole locations and heights against the same reference, and do it before the pour.
If the installation needs some room for adjustment, decide which part of the connection provides it when the fixing method is chosen. Do not plan on correcting cast-in anchor positions on site; instead, make the equipment mounting conditions and the foundation anchorage conditions agree from the start.
Projection Length: Which Surface Is It Measured From?
Projection has to match the whole connection (grout, baseplate, washer, and nut), not just the finished concrete surface. If the two drawings use different reference surfaces, the bolts can look right on paper and still be short of thread on site, so check the finish conditions as well.
Suppose the projection is measured from the top of the foundation to the bolt tip. Allowing only for the plate thickness leaves no length for the washer and nut. If grout goes between the foundation and the plate, its thickness must be added too.
The numbers below are fictional, chosen only to show how the dimensions stack up for a single-nut connection: grout 20 mm, plate 16 mm, washer 3 mm, nut 16 mm, and 5 mm of thread above the nut. They are not standard or recommended values.
If the grout is left out of this stack-up, the bolts end up 20 mm short above the foundation and the washer and nut cannot be fitted as planned. On real construction drawings, also check the nut arrangement and the usable thread length, and keep this separate from the embedment length inside the concrete.
Checks Before and After the Pour
During the pour, the anchors must stay in their planned positions and the concrete must fill properly around them. Being cast in does not guarantee consistent performance regardless of workmanship; the quality of the work and its records still matter.
If an anchor ends up out of position, do not decide on site to bend the bolt or enlarge the equipment holes. Either fix can change the anchorage or connection design, so the designers on the equipment side and the foundation side should agree on the correction first.
Corrosion is not ruled out just because the anchor is embedded. Exposed threads and places where water collects count too, and the material, surface treatment, indoor or outdoor exposure, and contact with water or chemicals all affect long-term maintenance.
If the equipment specification changes after the anchors are cast in, check whether the forces at the fixing points change as well as the hole locations. Equipment with a similar outline can have a different center of gravity or operating conditions, so do not reuse the original drawings as they are.
Anchor bolts that carry force into a foundation are also different from a tap plate, a plate with threaded holes for bolting parts together. Both are used for mounting, but anchorage into concrete and a threaded joint between parts are separate design questions. See our guide to tap plates on Japanese specs.
Post-Installed Anchors (Atouchi / Ato-Sekou): Fixed Into Cured Concrete
A post-installed anchor is fixed into concrete that has already hardened, usually by drilling a hole and anchoring in it. It is used for adding or modifying equipment on existing structures, and some new projects also choose it depending on the construction plan.
Post-installed does not mean glued in. JCAA divides post-installed anchors into mechanical (metal), bonded (adhesive), and other types. A metal expansion anchor grips the hole wall when its expansion part opens inside the hole, while a bonded anchor is held by the adhesive once it cures.
Both are post-installed, but they transfer force to the concrete differently and need different installation checks.
A conceptual figure of the anchoring mechanism. It does not show actual product shapes, hole diameters, embedment depths, or installation steps. On small screens, scroll the figure sideways.
Bonded anchors come as capsule systems and injection systems, and include the products commonly called chemical anchors or resin anchors. Materials and installation methods differ by product, so drilling a hole and filling it with any adhesive or mortar will not give the same performance.
The advantage of post-installed anchors is that the fixing points can be planned against an existing structure, sometimes without any new concrete work. The layout can be checked against the actual equipment and the existing piping before it is fixed.
- An option for adding or modifying equipment on existing concrete
- The layout can be planned after checking the actual equipment and the existing structure
- A product can be chosen to suit the anchoring method and service conditions
Installing later does not mean drilling anywhere you like. Edges of the concrete and the location of reinforcing bars must be checked. If the drill hits something during installation, do not simply move the hole a little; get a decision from the designer or the construction supervisor first.
Capacity Depends on Loads and the Concrete, Not the Method Name
Post-installed anchors are not only for light equipment, and their tensile capacity is not automatically lower than that of cast-in anchors. Design capacity is checked with all conditions set out together: anchor type and size, the state of the concrete, embedment, edge distance and spacing, and the forces acting on the anchor.
Do not read a catalog's maximum load or a test value as an allowable design load. Check under which conditions the number was obtained and how the design is meant to use it, then decide whether the anchor is acceptable based on the required evaluation and the governing design guideline.
Tension pulls the anchor out of the concrete; shear pushes the fixed part sideways along the concrete surface. Earthquakes, vibration, and piping loads add to the equipment weight, so weight alone does not settle the number of anchors or the method. What equipment suppliers should report for foundation design is covered in our article on equipment loading data for foundations.
Concrete thickness, distance to the edge, and spacing between anchors affect the anchorage, not just the bolt itself.
Arrows show directions and dimension items only, not load magnitudes or allowable dimensions. On small screens, scroll the figure sideways.
Thickness alone does not make concrete equally suitable everywhere; its strength and condition, including cracking, also count. Do not mistake a finishing mortar layer for structural concrete thickness, and confirm which part of the concrete actually carries the anchor force.
Near an edge, or where anchors are close together, the capacity of a single anchor with ample clearance may not apply. When reading a manufacturer's capacity table, check the conditions behind each test or design value, and do not carry a number over to a different embedment or base material.
More anchors do not always mean the single-anchor capacity can simply be multiplied. How the load is shared, the anchor layout, and the concrete failure mode interact, so the design is checked for the whole connection of the equipment.
Capacity is limited not only by the steel breaking but also by pullout and by a cone-shaped breakout of the concrete. The Japan Concrete Institute (JCI) describes this cone failure of the base concrete, so a thicker bolt does not always make the anchorage, foundation included, stronger.
How Japanese Practice Compares with ACI 318 and EN 1992-4
The cast-in vs. post-installed split exists in all three systems, but the documents that govern design and product approval differ. Use the table to know what to ask for, not as a statement that the systems are equivalent.
| Item | Japanese projects | US (ACI) | Europe (Eurocode) |
|---|---|---|---|
| Terms on drawings | 先埋め (sakiume) / 先付け; 後打ち (atouchi) / あと施工 | Cast-in anchors; post-installed anchors | Cast-in fasteners; post-installed fasteners |
| Design provisions | Depends on the structure and the client; ask which guideline the foundation designer uses | ACI 318 Chapter 17 (2019 edition): cast-in anchors such as headed studs and headed bolts, post-installed mechanical anchors, and post-installed adhesive anchors | EN 1992-4: cast-in fasteners (e.g., headed fasteners, anchor channels) and post-installed mechanical and bonded fasteners |
| Product qualification for post-installed anchors | Product data and installation instructions from the manufacturer; JCAA classifies types and runs installer qualifications | ACI 355.2 (mechanical) and ACI 355.4 (adhesive); adhesive anchors must be qualified to ACI 355.4 | European Technical Assessment (ETA) based on a European Assessment Document |
| Failure modes checked | Steel failure, pullout, and cone-shaped concrete breakout, among others | Tension: steel, concrete breakout, pullout, side-face blowout, bond (adhesive). Shear: steel, concrete breakout, pryout | Covered in EN 1992-4; check the standard for the full list |
Two practical points follow. First, if your site is in the US and the anchors are post-installed, the foundation designer will need qualification data for the anchor product that fits ACI 318, so check whether the product named on a Japanese drawing has it. Second, ACI 318 treats cracking as something that reduces tensile breakout capacity, and anchor data is given separately for cracked and uncracked concrete. Ask which assumption the design uses and whether the product is qualified for it. Also check which edition of each code your project adopts.
Installation Quality: What to Confirm, Not How to Do It
Drilling, Cleaning, and Cure Time
A post-installed anchor performs as rated only if the hole diameter, hole depth, installation tools, and condition inside the hole match the selected product. With bonded anchors, adhesive filling and curing conditions also count: an adhesive that looks hard on the surface is not a sign that the anchor can be loaded.
How and how many times the hole is cleaned depends on the product and the drilling method. Cure time depends on the product, the concrete temperature, and whether the hole is wet or dry. Installation follows the manufacturer's instructions and the construction plan, and water in the hole or an unusual drilling method needs its own check against the product's conditions of use.
The rated performance applies to a specific combination of adhesive, anchor rod, and drilling method, so do not swap one component for another. If a more readily available material is proposed on site, the designer and the manufacturer should confirm it first, and the change should go into the construction plan.
For mechanical expansion anchors, check that driving or tightening meets the product-specific completion criteria before treating the installation as complete. Tightening harder does not make the anchor safer, and work outside the specified conditions can damage the concrete or the anchor.
Drilling dust left in the hole means the required hole condition is not met, so cleaning is not an optional extra step. JCAA's installation procedure treats hole cleaning as a separate step and shows, for each anchor type, how the anchor is fixed and how completion is confirmed.
When work passes from one crew to another, share not only the time the adhesive was placed but also when the anchor may be loaded under the product's instructions. Mark which locations are still curing so that another crew does not set equipment or tighten nuts on them too early.
Record What Will Be Hidden After Installation
Inspection methods and records are planned to suit the use and requirements of the work. A pull test alone does not confirm everything. Link the installation records to the required inspections, and leave the evaluation of results and any decisions on defects to the design and supervision side.
Decide before installation what to record: product model, checks on the concrete, anchor locations and embedment, and conditions during installation. Some of this cannot be seen once the work is finished, so a photo of the completed bolts is not a full record.
Some layouts make anchor threads and the surrounding concrete hard to see once the equipment is set, so plan inspection access in the installation plan. Tell the design side which points need inspection after startup and how, and check on the installation drawing that equipment and piping do not block access.
Corrosion protection is not decided by cast-in vs. post-installed either; it depends on material, environment, and moisture at exposed parts and joints. A bonded anchor does not automatically seal the hole: Hilti's FAQ warns about water leakage when an anchor goes through a waterproofing layer.
Keeping the anchor method, model, locations, and installation records with the equipment documents makes later inspection easier. Plan inspections after startup together with your time-based maintenance (TBM) and condition-based maintenance (CBM) approach; see TBM vs. CBM.
Cast-In vs. Post-Installed: Side-by-Side Comparison
Start from whether the foundation is new or existing. Either way, check loads, the concrete, and installation quality.
Equipment supplier, foundation designer, and installer should agree not only on the hole locations but also on who checks which loads. Anchor bolts drawn on the supplier's installation drawing do not mean that the foundation anchorage has been designed.
If poor concrete or a clash with reinforcement turns up during the work, treat it as a change to the design assumptions. JCAA's description of its qualification system places the final decision on base material and installation defects with the designer and supervisor, not with an on-site judgment.
When comparing ease of installation, count survey, curing, cure waiting time, and inspection in the schedule, not just drilling time. Which method is faster depends on the project, so lay out both schedules under the same assumptions through to equipment setting.
If the equipment will be replaced in the future, check at that point whether the existing anchors can be reused. Even if they look sound and the holes line up, they cannot be assumed fit for the new equipment when the original design loads or installation records are unknown.
Two Typical Cases
For a new pump foundation, put the date the equipment drawing is finalized next to the pour date and see whether the cast-in anchor locations can be fixed in time. For an addition on an existing floor, start with a survey of the concrete and the reinforcement, then narrow down post-installed products that meet the required layout and installation conditions.
In both cases, the reason for the choice should go beyond "it's new" or "it's a retrofit" and cover loads, concrete, and feasible installation conditions. Choose the fixing method with ease of installation, the loads carried into the foundation, and maintenance after startup all in view. When comparing quotes, align the scope, including surveys and inspection, so that schedule differences hidden behind unit prices become visible.
Anchor Review Checklist
- Each anchor on the drawing is marked cast-in (sakiume) or post-installed (atouchi / ato-sekou), and the type of post-installed anchor (mechanical or bonded) is stated
- Anchor locations on the foundation drawing and baseplate holes on the equipment drawing use the same reference centerlines
- The reference surface for projection is stated, and the stack-up includes grout, plate, washer, nut, and thread above the nut
- Embedment is shown separately from projection
- It is agreed who provides and who checks each load used for anchor design (seismic, vibration, and piping loads included), and who is responsible for the anchorage design
- The design guideline or code for the anchorage is named (for US sites, ACI 318 Chapter 17)
- For post-installed anchors: product model, qualification data for the site's code, and whether it is rated for cracked concrete
- Edge distance, spacing, and concrete thickness are checked against the product's conditions
- Records to keep (model, locations, embedment, installation conditions, inspection results) are agreed before installation
- Who decides if an anchor is mislocated or the drill hits reinforcement
Questions to Ask the Japanese Supplier
- On your drawing, does 先埋め (sakiume) or 後打ち (atouchi) apply to all anchor bolts, or only to some of them?
- Are the anchor bolts in your scope of supply, and which drawing shows their size, length, embedment, and projection?
- Which surface is the projection measured from, and what grout thickness did you assume?
- Were the anchor sizes based on your own calculation, or are they to be designed by the foundation designer?
- If post-installed anchors are specified, which product and model did you assume, and does it have qualification data for our local code?
- Is there any adjustment allowance in the baseplate holes, or must the anchors match the drawing exactly?
Sample Inquiry Email
Subject: Anchor bolt details on installation drawing [drawing number]
Dear [Name],
Thank you for the installation drawing for [equipment tag]. Before our foundation design is finalized, could you confirm the following?
1. Whether each anchor bolt is cast-in (先埋め) or post-installed (後打ち/あと施工).
2. Bolt size, total length, embedment, and projection, and the surface the projection is measured from.
3. The grout thickness you assumed under the baseplate.
4. Whether the anchor bolts are in your scope of supply.
5. For post-installed anchors, the product and model you assumed.
Our foundation will be designed to [ACI 318 / local code]. Please also let us know which loads you have checked for the anchors and which you expect our foundation designer to check.
Best regards,
[Your name]
Limits of This Guide
- This is not an anchor design method or installation procedure. Anchor design, product selection, and installation follow the project designer and the manufacturer's instructions.
- The projection example uses fictional numbers to show the stack-up only.
- The code comparison is a map of which documents apply, not an equivalence. Details, editions, and local amendments must be checked in the documents themselves.
- Labels on Japanese drawings vary by company and industry; confirm the meaning with the drawing's author.
FAQ
Are Cast-In Anchors Always Stronger Than Post-Installed Anchors?
No. The method name does not decide capacity. Capacity is checked with load direction, anchor shape and embedment, concrete, layout, and installation conditions set out together. A cast-in anchor that is mislocated or poorly anchored is still a problem, and a post-installed anchor needs a performance evaluation and product selection suited to its use.
Is a Post-Installed Anchor the Same as a Chemical Anchor?
Not necessarily. Post-installed anchors include mechanical and bonded types, and "chemical anchor" refers to bonded (adhesive) products. Keeping "when it is installed" separate from "how it is held" prevents assuming two products install the same way just because of their names.
Can I Move the Hole Slightly If the Drill Hits Rebar?
Not without the designer's decision. Moving the hole can change edge distance, spacing, and how loads act on the fixed part. Check the reinforcement and embedded items, and proceed only after the designer or supervisor's decision is reflected in the construction plan and drawings.
Can Equipment Be Set Once the Adhesive Feels Hard?
No. Surface hardness is not enough; the product's temperature conditions, cure time, and completion and inspection conditions must be met. Tightening nuts also loads the anchor, so check the product instructions for when tightening is allowed, not just when the equipment weight can go on.
Can Post-Installed Anchors Be Used in Any Existing Concrete?
No. The type, thickness, strength, and condition of the concrete and the anchor's conditions of use must be checked, so they do not suit every existing structure. For heavy equipment or critical fixings, design the whole load path from the equipment into the foundation and combine the necessary surveys with installation control.
Sources
- Definitions of cast-in and post-installed anchors; mechanical, bonded, and other types; capsule and injection systems: JCAA, "Basics of Post-Installed Anchors" (Japanese)
- Installation steps by anchor type, including hole cleaning and completion checks: JCAA, "Post-Installed Anchor Installation Procedure" (Japanese)
- Role of installers vs. designers and supervisors: JCAA, "Qualifications" (Japanese)
- Cast-in anchor shapes and anchoring mechanisms: Hilti Japan, "Mechanical Anchors vs. Adhesive Anchors" (Japanese)
- Product and base material conditions; waterproofing layers: Hilti Japan, "FAQ on Adhesive Anchors" (Japanese)
- Concrete thickness, edge distance, and embedment as capacity conditions: Hilti Japan, "Anchor and Fastening Technical Manual" (Japanese)
- Post-installed anchors and cone-shaped concrete failure: Japan Concrete Institute, "Talking About Concrete," August 2026 (Japanese)
- Scope of ACI 318 Chapter 17 (cast-in, post-installed mechanical, and adhesive anchors): Hilti Canada, "Design for Yield Using Anchoring to Concrete Provisions"
- ACI 355.2 / ACI 355.4 qualification and failure modes: American Concrete Institute webinar, "Anchorage to Concrete" (ACI 318-19 Chapter 17) and STRUCTURE magazine, "Post-Installed Anchors"
- EN 1992-4 scope: GlobalSpec, EN 1992-4 summary; the roles of EADs and ETAs: Würth Group, "EN 1992-4" presentation
Original article in JapaneseThis guide is adapted from a MONOSCOPE article written for readers in Japan: 先埋めアンカーと後打ちアンカーの違い|固定方法と使い分け
About the editor
 MONOSCOPE EditorFOUNDER & EDITOR
Spent about ten years at a plant equipment maker and a plant engineering company, proposing, designing, and commissioning equipment, then moved into web marketing. Now a web consultant for B2B manufacturers, helping them explain their products and technology. Licensed in Japan as an Energy Manager and a Third-Class Chief Electrical Engineer.
Has run an engineering blog since 2017 (500+ articles) and a Japanese YouTube channel with about 20,000 subscribers. Each English guide is written from the Japanese shop-floor point of view and checked against the cited standards.