DRBFM vs FMEA: Design Review Steps, Template & Example
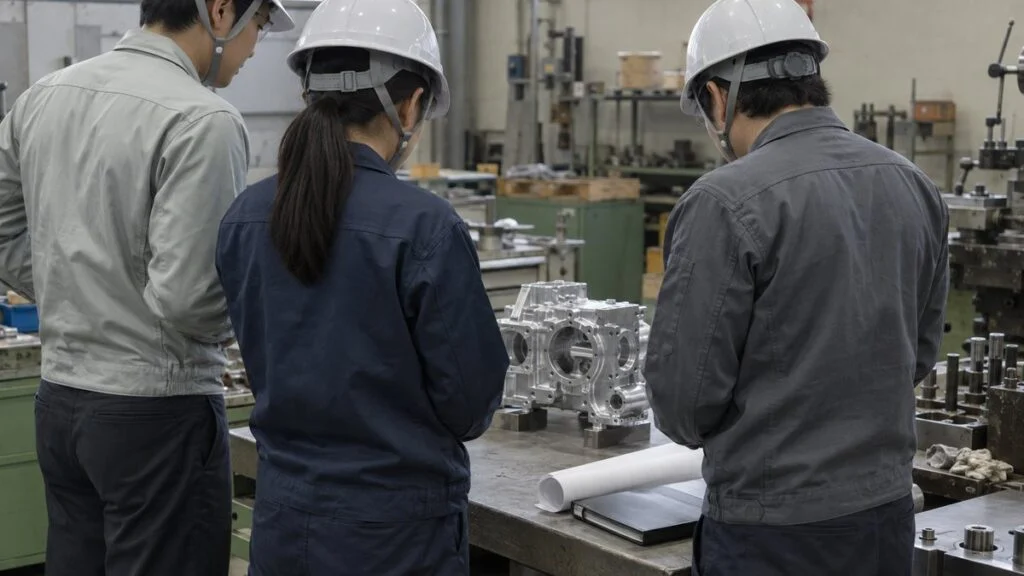
Your company supplies parts to a Japanese automaker or one of its Tier 1 suppliers. You plan a small change, such as a new resin grade, a second molding plant, or a revised bracket. The customer then asks for a DRBFM before they will approve it, and invites you to a "DR" meeting. If your quality system is built around FMEA, the request raises questions. Why another worksheet? What does the customer expect to see on it? And what happens in the meeting?
This guide explains both parts. A design review (DR), called sekkei shinsa (設計審査) in Japanese, is a planned check of a design by people outside the design team. DRBFM (Design Review Based on Failure Mode) is a Toyota-origin way of running that review that focuses only on what has changed. Below you will find where design reviews fit in a development program, how to run one in six steps, what to check at each stage, how DRBFM differs from FMEA, a filled-in DRBFM example (fictional), a blank DRBFM template, and a list of questions to settle with your Japanese customer.
- A design review (DR) is a planned, documented review in which manufacturing, quality assurance, purchasing, and other departments examine a design and decide whether it can move to the next stage.
- Hold one at each stage gate. Even on a small project, treat three reviews as mandatory: before design starts, before drawing release, and before mass production.
- Run each review in six steps: (1) set the purpose and pass criteria, (2) send materials in advance, (3) invite the right reviewers, (4) focus the discussion, (5) decide and log every finding, (6) follow up and roll the lessons out to other products.
- DRBFM narrows the discussion to the changes from a proven design. Its worksheet runs: change → concern → when it could occur → effect on the customer → design action → how to verify it.
- To keep reviews from becoming a formality, treat "conditional pass" and "re-review" as legitimate outcomes, require evidence with every finding, and give each finding an owner and a due date.
Contents
- What Is a Design Review (DR)?
- When to Hold Design Reviews
- How to Run a Design Review in 6 Steps
- Design Review Checklist by Stage
- Who Attends a Design Review and What Each Role Checks
- What Is DRBFM?
- DRBFM vs. FMEA
- DRBFM Example: Steel Bracket Changed to Resin (Fictional)
- DRBFM Template: Worksheet Columns and What to Write
- Why Design Reviews Become a Formality, and How to Prevent It
- Questions to Settle with Your Japanese Customer
- Limits of This Guide
- FAQ
What Is a Design Review (DR)?
Japan's dependability vocabulary standard, JIS Z 8115, defines a design review as a documented, planned review of design activities. It is not an informal meeting called when someone has a question. The review is built into the plan in advance, and its results are recorded.
A note in the same standard says the review covers any activity that finds and corrects problems in the requirements or in the design work. A DR therefore goes beyond hunting for drawing errors: it also checks whether the requirements were understood correctly in the first place.
Its purpose is to catch problems the responsible designer is unlikely to spot alone, using people with other viewpoints: manufacturing, quality assurance, purchasing, and sales. J-Net21, a support site run by Japan's Organization for Small & Medium Enterprises and Regional Innovation (SMRJ), describes DR as a process in which people from several departments check both design quality and manufacturing quality.
How Design Review Relates to ISO 9001
Clause 8.3.4 of ISO 9001, "Design and development controls," requires reviews, verification, and validation. Problems found must be acted on, and records must be kept. That is why companies certified to ISO 9001 tend to have a formal DR process.
Review, verification, and validation are easy to mix up. Each has a different purpose. The simplest way to place DR is this: a DR decides whether the design can go on to the next stage as it is.
All three are checks, but each asks a different question.
ISO 9001 allows these activities to be done separately or in any combination. Checking verification results during a DR is common practice.
When to Hold Design Reviews
A DR is not a one-time event at the end of development. The basic practice is to hold one at each stage gate, from planning to production launch, and treat it as the gate the project must pass. Companies split and name the stages differently. A common pattern is six stages:
Place a DR at each stage gate. The project moves on only after it passes.
The number and names of stages vary by company and product. Compiled by MONOSCOPE from explanations by Skillnote and Koto Online (Japanese).
These stages closely follow the designer's own workflow. One approach is to line up design milestones with review milestones: DR2 when concept design is done, DR3 when the drawing set is complete. The DR then becomes part of the process rather than extra work.
The earlier the review, the cheaper the fix. A problem found at the concept stage may only need a different approach. Found after the mold is cut, the same problem means reworking or remaking the mold. Found after mass production starts, it can turn into a field fix. Taking DR1 to DR3 seriously is the shortest route to less rework overall.
How Many Reviews a Small Project Needs
For minor part changes or derivative products, holding all six as formal meetings is not realistic. J-Net21 lists three points for holding a DR: before design starts, before drawing release, and before mass production. An easy way to start is to make those three mandatory and add stages only for projects with a lot of new content.
However small the change, do not skip the review before drawing release. Once drawings go to outside suppliers or to manufacturing, the cost of a correction and the number of people involved both jump.
How to Run a Design Review in 6 Steps

Placing reviews at every stage gate achieves little if each meeting is run carelessly. The six steps below take a single DR from preparation to closing out the actions. The meeting itself is only one of the six, and most of the outcome is decided before and after it.
The meeting is just the middle step. Preparation and follow-up decide the result.
For small changes, Steps 1–3 can be simplified, but Steps 5 and 6 should not be skipped.
Step 1: Set the Purpose and Pass Criteria
First, define the decision this review needs to make. Tie it to the next action: "Can we release the prototype drawings?" or "Can we order the production line equipment?"
Then set the conditions for a pass. Examples: "Calculations show enough margin against the performance targets," or "All major findings are closed, or their action plans are approved." Without criteria, the conclusion tends to follow whoever speaks loudest.
Step 2: Prepare the Materials and Send Them in Advance
Do not just stack up drawings and specifications. Open the package with what changed from the previous product and where you have concerns, so reviewers can find the issues quickly in the limited time.
Send the materials a few days before the meeting and ask reviewers to read them first. If many people see the materials for the first time in the meeting, the meeting is spent on explanations, and the findings stay superficial.
Step 3: Invite Reviewers Who Fit the Topics
Rather than inviting the same group every time, choose reviewers for the topics at hand. A new material calls for a materials or surface-treatment specialist; a new manufacturing method calls for manufacturing engineering and production. Always include someone who knows the changed area well. The section on roles below sets out what each department checks.
Step 4: Keep the Discussion Focused
Open the meeting by restating the purpose and pass criteria. The designer then presents mainly the changes and concerns. If the general overview runs long, there is no time left for the discussion that matters.
As a rule, every finding comes with evidence, such as a past failure, a calculation, or a test result, not just a vague worry. When an issue cannot be settled in the room, agree who will investigate what and how the next decision will be made, then move on.
Step 5: Decide and Record the Findings
End the meeting with a clear decision: pass, conditional pass, or re-review. Moving to the next stage with an unclear decision defeats the purpose of holding the DR.
Do not bury findings in the meeting minutes. Record them one by one in an action item log with these columns:
- No.
- Description
- Severity
- Owner
- Due date
- Action taken and result
ISO 9001 also requires action on problems found in reviews and retention of the records.
Step 6: Follow Up and Roll Out the Lessons
A DR pays off only when its findings are acted on. When a due date arrives, check the item's status in the log. Close it only after the person who raised it, or quality assurance, confirms that the action is adequate.
Next, take the findings that apply to other products and add them to your design standards and checklists. Japanese companies call this yokoten (横展, horizontal deployment). This step decides whether the same findings come up at every review or the organization's design quality keeps improving.
Related: How to Write an 8D Report: D0–D8 and the Toyota 8-Step
Design Review Checklist by Stage
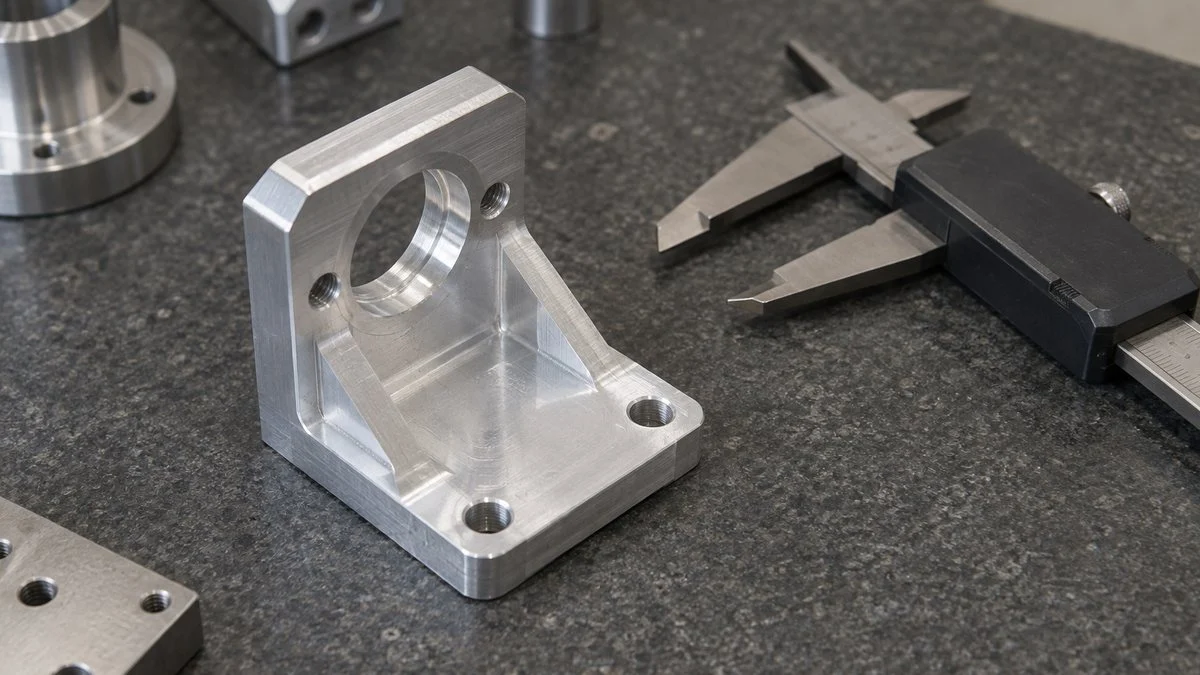
What a DR looks at changes with the stage. Tolerances are too early a topic at the planning stage, and debating the product concept just before mass production is too late. To use the limited time well, focus on what can only be decided at that stage.
As the project moves on, the focus shifts from ideas to parts and processes.
- Do the development targets reflect the customer requirements?
- Is the chosen approach technically feasible?
- Have regulatory, standards, and safety requirements been identified?
- Are the target cost and schedule realistic?
- Basis for strength, life, and thermal calculations or analyses
- Tolerances, ease of assembly, and whether the shape can be made
- Choice of materials and purchased parts, and their availability
- BOM matches the drawings; past failures reflected
- Do the results meet the targets, and with what margin?
- Do the test conditions represent actual use?
- Are failure causes identified and fixes reflected in the drawings?
- Difficulties in building the prototype
- Process capability, inspection methods, jigs, fixtures, and equipment
- Work instructions and operator training
- Supplier production readiness and first-article checks
- Early defect trends and market feedback
Compiled by MONOSCOPE from explanations by J-Net21, Skillnote, and Koto Online (Japanese). Adding your own past failures turns this into a stronger checklist.
Planning and Concept: Confirm Requirements and Approach
Reviews at the planning and concept stage come before any drawings. They look at what to build and how to achieve it. The main questions are whether customer requirements have been translated correctly into development targets, and whether the chosen approach is technically feasible.
Regulatory, standards, and safety requirements are easy to miss here, and finding them later can force a change to the basic structure. We recommend listing the applicable regulations and standards at the concept stage. Input from sales and quality assurance is especially valuable at this stage.
Before Drawing Release: Can It Be Made, and Will It Work?
The review before drawing release usually produces the most findings. Check whether strength and life calculations and CAE results leave enough margin against the targets, and whether their assumptions are valid.
From the manufacturing side, check:
- Can the shape be made?
- Can the part be assembled?
- Are the tolerances right for both function and machining cost?
Knowing when to use dimensional and when to use geometric tolerances makes these findings sharper.
Related: Datum Selection in GD&T: JIS vs ASME on Japanese Drawings
Review the bill of materials (BOM) as well as the drawings. If part numbers or quantities in the engineering BOM do not match the drawings, the errors carry over into the manufacturing BOM. Keep the EBOM/MBOM split in mind and check that all data handed to manufacturing is consistent.
Prototype Evaluation: Question Both Results and Conditions
At the prototype review, check not only whether the results met the targets but also whether the test conditions represent how the product is actually used. If temperature, vibration, or cycle counts were too mild, a pass means little.
Go through every failure from the prototype build one at a time: is the cause identified, and is the fix reflected in the drawings or specifications? Also ask the team that built the prototypes which areas were hard to assemble and which dimensions tended to vary.
Before Mass Production: Can the Process Build It Consistently?
At the review before mass production, the focus moves from the product to the process. The main items are:
- Readiness of equipment, jigs, and fixtures
- Process capability
- Inspection methods
- Work instructions and training
- Readiness of suppliers of purchased parts
Much of this preparation overlaps with the work of manufacturing engineering.
During early production after launch, which Japanese plants call shoki ryudo (初期流動, early production control), check early defect trends and market feedback, and move to normal control once no problems remain. Set the exit criteria for early production in advance, or the special controls tend to drag on.
Who Attends a Design Review and What Each Role Checks
Who attends has a large effect on the quality of a DR. J-Net21 describes a setup in which the managers of sales, engineering, manufacturing, manufacturing engineering, quality control, and procurement attend, with senior management joining when the technical risk is high.
What matters is that each person knows what to check from their own position, rather than sitting in because they were invited. The roles break down as follows:
Splitting people into those who run, present, and review makes each role clear.
Compiled by MONOSCOPE from explanations by J-Net21 and Skillnote (Japanese). Add materials, electrical, or software experts, or senior management, as the project requires.
Quality assurance often acts as the secretariat that runs the DR process itself, including the design reviews held before mass production.
Related: Quality Assurance Process at Japanese Plants: 8 Steps
Many companies have the design manager chair the review, but schedule and budget pressure then tends to soften the decision. On important projects, a manager from quality assurance or another department can chair. Putting someone one step removed from design in the chair keeps the decision independent.
What Is DRBFM?
Design reviews often lose focus because they try to give everything equal attention. A response to this problem is DRBFM (Design Review Based on Failure Mode), which originated at Toyota Motor Corporation. It is known as a method systematized by Tatsuhiko Yoshimura, who worked at Toyota and also served as a professor at Kyushu University.
DRBFM starts from the idea that problems tend to arise when a proven design is changed. The team lists what has changed compared with the existing design and concentrates the discussion on the concerns those changes raise.
The method is no longer confined to Japan. SAE International published SAE J2886, "Design Review Based on Failure Modes (DRBFM)," in March 2013 (current edition: April 2023), and AIAG published its DRBFM reference guide, CQI-24, in September 2014. If a North American customer refers to DRBFM, one of these documents is the likely reference. Confirm which one with the customer.
Changes and Changes in Conditions (Henkoten and Henkaten)
Japanese DRBFM material separates two kinds of change. Henkoten (変更点) are changes you make on purpose. Henkaten (変化点) are changes in conditions or environment that happen without anyone intending them. Both must be listed, as Figure 6 shows.
List not only what you changed, but also what changed around the design.
Compiled by MONOSCOPE from Nikkei xTECH, "Four viewpoints needed for managing changes in Toyota-style DRBFM" (Japanese).
GD3: Good Design, Good Discussion, Good Dissection
DRBFM values three things, known as GD3: Good Design, Good Discussion, and Good Dissection. "Dissection" here means taking apart the hardware after testing and looking at it closely.
In practice: keep changes small and limited to specific areas, have the people involved discuss each change in concrete terms, and examine the tested parts carefully to find weak points.
You can bring this thinking into an ordinary DR simply by putting a list of changes and changes in conditions at the front of the materials. When reviewers can see at a glance how the design differs from the existing product, they spend their limited time where discussion is really needed.
DRBFM vs. FMEA
As the name says, DRBFM brings failure-mode thinking into the design review, so it is often compared with FMEA (failure mode and effects analysis). The key difference is scope: DRBFM limits the discussion to the changes and what they touch.
| FMEA | DRBFM | |
|---|---|---|
| Scope | Identifies failure modes comprehensively across the design or process | Limited to changes from a proven design and the areas they affect |
| Best suited to | New designs and new content | Carryover designs with specific changes |
| Main output | A systematic analysis of failure modes, their effects, and actions | Concerns about each change, design actions, and how to verify them, agreed in a review |
| How they relate | An existing FMEA is useful input for judging how far a change reaches. AIAG describes DRBFM as focused on engineering changes once a baseline design exists, and DRBFM does not require an FMEA. SAE J2886 states that DRBFM is not intended to replace FMEA. In the AIAG system, DRBFM (CQI-24) is a separate document from the AIAG & VDA FMEA Handbook. | |
A practical split that keeps the workload down: use FMEA to cover new design content thoroughly, and use DRBFM to focus on the changes in carryover designs. If your customer requires both, ask how they want the two documents linked.
Related: AIAG-VDA FMEA for Japanese Customers: DFMEA vs PFMEA
DRBFM Example: Steel Bracket Changed to Resin (Fictional)
For each change, a DRBFM worksheet records what the concern is, when it could occur, how it would affect the customer, and what design action will address it.
The designer fills in the worksheet first. On the day of the DR, reviewers from other departments add concerns and causes the designer missed, and the team agrees on the design actions and how to verify them.
Here is how the worksheet might look for a change from a steel bracket to a resin one.
| Column | Example entry |
|---|---|
| Change / change in conditions | Material of a bracket mounted near the engine changed from cold-rolled steel sheet (JIS SPCC) to 30% glass-fiber-reinforced nylon (PA66-GF30) to save weight |
| Concern (failure mode) | (1) The bolted joint loosens. (2) The mounting holes shift and the part cannot be installed. |
| When could it occur? (cause) | (1) In an area that stays hot, the clamp load acts on the resin continuously; the resin slowly deforms (creep) and the clamp load drops. (2) In a humid environment, the resin absorbs moisture and its dimensions change. |
| Effect on the customer | Noise and vibration. In the worst case, the part falls off. |
| Design action to remove the concern | Mold metal collars into the bolted joints so the metal carries the clamp load. Make the mounting holes slots that allow for thermal expansion and dimensional change from moisture absorption. |
| Evaluation and verification | Clamp-load retention test after high-temperature soak; dimensional measurement after high-temperature, high-humidity soak; vibration test on the actual equipment |
| Owner and due date | Design engineer (testing by the test engineer). Report results by the next DR. |
The column that matters most is "When could it occur?", and it must be specific. An entry like "insufficient strength" goes nowhere. "When the clamp load acts continuously in an area that stays hot" names the condition, which also makes it easier to decide how to test it.
Even when the change is to a material, look at it together with the environment it will see, such as temperature and humidity. That keeps concerns from being missed.
DRBFM Template: Worksheet Columns and What to Write
Use this layout as a starting point when your customer has not supplied a form. If the customer has its own DRBFM form, use theirs, because column names and order vary by company. This template follows the same columns as the example above.
| Column | What to write | Common weak entry |
|---|---|---|
| No. | One row per concern, so each can be tracked to closure | Several concerns merged into one row |
| Change / change in conditions | What changed compared with the existing design: design, material, process, or use and environment, and why | "Minor change" with no comparison to the existing part |
| Concern (failure mode) | What could go wrong with the part because of this change | "No concern" without explaining why |
| When could it occur? (cause) | The specific conditions: temperature, humidity, load, time, how it is used or assembled | "Insufficient strength" with no conditions |
| Effect on the customer | What the end user or the next assembler would experience | Effect on the part only |
| Design action | The change to the design that removes or reduces the concern | "Will be careful" or "will inspect" instead of a design action |
| Evaluation and verification | The test or analysis that proves the action works, with its conditions | Test conditions milder than actual use |
| Owner and due date | One named person and a date, often the next DR | A department name instead of a person; no date |
| Result and status | Test result, judgment, and the date the item was closed | Left blank after the meeting |
Why Design Reviews Become a Formality, and How to Prevent It

Even companies with a DR process often hear complaints: "We hold the meetings, but they never find anything," or "Findings come up, but nobody fixes them." J-Net21 also warns against letting DR become a formal ritual. Japanese writers call this keigaika (形骸化), when a process survives in form but has lost its substance. It follows recognizable patterns, and tracing each symptom back to its cause points to the fix.
Most symptoms come from missing steps before and after the meeting.
Compiled by MONOSCOPE from explanations by J-Net21, Koto Online, and Skillnote (Japanese).
Holding the Meeting Has Become the Goal
The root problem is that holding the DR has become the goal in itself. If the schedule fixes only the DR date and nobody shares what the meeting is supposed to decide, it turns into a presentation, and the verdict is always "pass."
The first fix is to treat conditional pass and re-review as legitimate outcomes, not failures. If the schedule assumes a re-review may happen, there is no reason to soften the decision.
Findings Come Without Evidence
Koto Online names three reasons design reviews become a formality:
- Off-the-cuff findings
- Reviewers attending without reading the materials
- Inconsistent rules
When off-the-cuff findings keep coming, designers spend their time answering each one, and the findings that really matter get buried.
Make it a rule that findings come with evidence: past failures, calculations, or test results. Treat a concern that cannot be backed up on the spot as an open investigation item. Decide who will check what by when, and the discussion can keep moving.
The Review Has Become a Place to Assign Blame
When a DR becomes a place to point out the designer's mistakes, designers stop writing their concerns into the materials. That is the most serious state a DR can reach: a review where no concerns come up throws away its own chance to find problems.
Skillnote also stresses constructive findings that include suggestions for improvement rather than criticism. The chair can change the mood by giving credit to designers who raise concerns themselves, and by asking reviewers to offer an alternative or a way to verify along with each finding.
Records Are Not Used Next Time
The findings and actions recorded at a DR are valuable knowledge for the next project. J-Net21 also calls for DR results to be recorded, organized, and used in developing the next product.
Do not file the action log away with each product. Tally findings by category, add the recurring ones to checklists and design standards, and hold a review of the process itself, even once a year. The DR process will then improve step by step.
Questions to Settle with Your Japanese Customer
When a Japanese OEM or Tier 1 customer asks you for a DRBFM or invites you to a DR, get answers to these questions before you start the worksheet:
- Which changes in this project need a DRBFM: design, material, process, plant, or sub-supplier changes?
- Do you have a required DRBFM form, and in which language should we fill it in?
- Which reference do you follow: your own internal rules, SAE J2886, or AIAG CQI-24?
- Do you also need an updated DFMEA or PFMEA, and how should it link to the DRBFM?
- Who from your side will attend the review, and should our manufacturing and quality engineers join?
- When do you need the worksheet before the meeting, and how will you send your comments?
- What counts as a pass: are open items with agreed due dates acceptable?
- Which tests and test conditions do you expect for verification, and do you need the raw data?
- Does this change also need a formal change notification or approval on your side, and in what order?
Pre-Review Checklist
- Purpose of the review and pass criteria written down
- List of changes and changes in conditions (design, material, process, use and environment) at the front of the materials
- Comparison with the existing, proven design for every change
- Specific conditions in every "When could it occur?" entry
- A design action, not just an inspection, for every concern
- Test conditions that represent actual use
- Materials sent a few days before the meeting
- Reviewers who know the changed area invited
- Action log ready, with owner and due-date columns
Limits of This Guide
- Practices vary. The number of review stages, their names, the DRBFM form, and the pass criteria differ by company, industry, and customer. Your customer's requirements come first.
- This is not a summary of SAE J2886 or AIAG CQI-24. We have not reviewed the full text of either document. If your customer names one, work from that document.
- The worksheet example is fictional. The materials, causes, and tests show how to fill in the columns. They are not design guidance for an actual resin bracket.
- Safety and regulatory decisions belong to the responsible people. A DR can point out which regulations and standards apply, but compliance is decided by your engineering, safety, and legal teams under the rules that apply to the product.
FAQ
What Does DRBFM Stand For?
DRBFM stands for Design Review Based on Failure Mode. It is a design review method that originated at Toyota and focuses the discussion on changes from a proven design. SAE documents it as J2886, and AIAG publishes a DRBFM reference guide, CQI-24.
What Is the Difference Between DRBFM and FMEA?
FMEA identifies failure modes comprehensively, while DRBFM limits the discussion to the changes from the existing design and the areas they affect. A practical split is FMEA for new design content and DRBFM for the changes in carryover designs. An existing FMEA is useful input for judging how far a change reaches.
How Many Design Reviews Does a Project Need?
The basic practice is one at each stage gate; six stages from planning to early production is a common pattern. For a small project, start with three mandatory reviews: before design starts, before drawing release, and before mass production. Add more only for projects with a lot of new content.
Does ISO 9001 Require Design Reviews?
Yes. Clause 8.3.4 of ISO 9001 requires reviews, verification, and validation during design and development, action on problems found, and records of those activities. The three can be done separately or in any combination, and checking verification results during a DR is common.
Who Should Chair a Design Review?
Ideally someone one step removed from design. Many companies let the design manager chair, but schedule and budget pressure then tends to soften the decision. On important projects, a manager from quality assurance or another department keeps the decision independent.
Sources
- Definition of design review: JIS Z 8115:2019 Glossary of terms used in dependability, entry 192-12-09 "design review" (Japanese)
- DR timing, attendees, and cautions: J-Net21 (SMRJ), "Design review in the product development process" (Japanese)
- ISO 9001 clause 8.3.4 requirements: pdcatovision.com, "Requirements for design and development review" (Japanese)
- DR by stage and how to run it: Skillnote, "What is a design review (DR)?" (Japanese)
- Running a DR and why reviews become a formality: Koto Online, "What is a design review?" (Japanese)
- DRBFM overview: Toyota Enterprise, DRBFM course (Japanese); Wikipedia, "Design review based on failure mode"
- Four viewpoints for changes: Nikkei xTECH, "Four viewpoints needed for managing changes in Toyota-style DRBFM" (Japanese)
- SAE J2886: SAE International, J2886_202304 Design Review Based on Failure Modes (DRBFM)
- AIAG CQI-24: AIAG, CQI-24 DRBFM Reference Guide
Original article in JapaneseThis guide is adapted from a MONOSCOPE article written for readers in Japan: デザインレビュー(DR)の進め方|段階別のチェック観点・DRBFMの記入例と形骸化の防ぎ方
About the editor
 MONOSCOPE EditorFOUNDER & EDITOR
Spent about ten years at a plant equipment maker and a plant engineering company, proposing, designing, and commissioning equipment, then moved into web marketing. Now a web consultant for B2B manufacturers, helping them explain their products and technology. Licensed in Japan as an Energy Manager and a Third-Class Chief Electrical Engineer.
Has run an engineering blog since 2017 (500+ articles) and a Japanese YouTube channel with about 20,000 subscribers. Each English guide is written from the Japanese shop-floor point of view and checked against the cited standards.